If you’re a backpacker, then you know that there’s nothing worse than having a rip in your tent. A torn tent can mean cold, wet nights and an overall miserable experience. In this comprehensive guide, we will teach you how to repair a ripped backpacking tent.
A ripped backpacking tent can usually be repaired with some basic sewing supplies. Start by inspecting the extent of the damage and then Choose a thread that is close in color to the tent fabric. If the tear is small, you can simply hand-sew it shut.
However, if the tear is large or located in a high-stress area, you may need to use a sewing machine. In either case, begin by securing the fabric around the edge of the tear with a few stitches. Then, work your way across the tear, using a single stitch or a series of small stitches to close it up.
Once the tear is closed, reinforce the area with a line of stitching along either side. Finally, SEAL the repair with a waterproof adhesive. This will help to prevent further damage and ensure that your tent can withstand even the most inclement weather conditions.
How to Patch a Backpacking Tent
A backpacking tent is a small, lightweight shelter that is easy to carry on your back. These tents are designed for solo hikers or groups of hikers who want to travel light. However, because they are made of lightweight materials, they are also more susceptible to damage. If you find yourself in need of a tent repair, here is a simple guide to patching a backpacking tent.
First, you will need to clean the area around the hole or tear. This will help the adhesive to stick better.
Next, cut a piece of fabric that is slightly larger than the hole or tear. Apply a generous amount of adhesive to the back of the fabric, and then press it firmly into place.
Finally, let the adhesive dry completely before using the tent again. With a little bit of care, your backpacking tent will be as good as new.
How to Fix a Broken Tent Pole on A Backpacking Tent
If you find yourself in the wilderness with a broken pole on your backpacking tent, don’t panic. There are a few easy ways to fix the problem and get back to enjoying your camping trip. First, try using some duct tape to secure the broken pieces of the pole together. If that doesn’t work, or if you don’t have duct tape, you can try lashings the pole to a nearby tree or using rocks to prop up the tent. If all else fails, you can always build a makeshift shelter out of leaves and branches. Just remember to stay calm and use your resources wisely, and you’ll be able to fix the problem in no time.
How to Sew a Backpacking Tent
When you are planning a backpacking trip, one of the most important pieces of gear you will need is a good tent. Not only will it shelter you from the elements, but it will also give you a place to store your gear and get some rest. While you can purchase a tent, sewing your backpacking tent can be a rewarding experience. In addition, it will allow you to customize the size, shape, and features of your tent to meet your specific needs. Here are the steps you will need to take to sew a backpacking tent:
- Choose the right fabric. When it comes to tents, not all fabrics are created equal. You will want to choose a fabric that is lightweight yet durable, such as nylon or polyester.
- Cut out the pattern pieces. Once you have chosen your fabric, you will need to cut out the pattern pieces for your tent. Be sure to include a tent seam allowance in your cuts.
- Sew the panels together. Begin by sewing the panels that make up the sides and roof of your tent together. Then, sew the floor panel to one of the side panels.
- Add reinforcement at the corners. To help reinforce the corners of your tent, sew an additional panel of fabric onto each corner. This will help to prevent tearing at these stress points.
- Add any desired features. Finally, you can add any desired features to your tents, such as zippered doors or windows. When you are finished, your tent should be ready for use on your next backpacking trip!

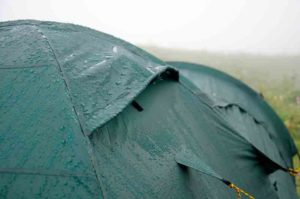
How to Waterproof a Backpacking Tent
Backpacking tents are designed to be lightweight and easy to carry, but they usually trade off some waterproofing for this portability. As a result, it is important to know how to waterproof a backpacking tent before heading out on your trip. The first step is to select the proper tent. Look for one that is made of waterproof or water-resistant fabric, and make sure all the seams are taped or sealed.
Once you have your tent, give it a thorough rain test at home before packing it up for your trip. If you see any leaks, apply a seam sealer to the problem areas. When setting up your tent, make sure to pitch it in an area that is protected from the wind and rain. Use guy lines and stakes to secure the tent, and consider using a tarp as an extra layer of protection.
With a little bit of preparation, you can make sure your backpacking trip is dry and comfortable.
Miscellaneous Tips for Repairing Backpacking Tents
Most backpacking tents are made with a waterproof, breathable fabric that is designed to withstand harsh weather conditions. However, even the best tents can develop holes or tears over time. When this happens, it is important to repair the damage as soon as possible to prevent further damage from occurring. Here are some tips for performing common tent repairs:
- If a hole or tear is small, you can often patch it using adhesive tape or fabric glue.
- For larger holes or tears, you may need to sew a patch onto the inside of the tent.
- If the damage is extensive, you may need to replace the entire rainfly or canopy.
- When making any repairs, be sure to use materials that are compatible with the fabric of your tent. Otherwise, you may void the warranty.
With proper care and maintenance, your backpacking tent should last for many years. However, accidents happen and it is always good to be prepared for minor repairs. By following these tips, you can keep your tent in good condition and extend its lifespan.
What’s in A Tent Repair Kit?
Tent repair kits vary, but they often include items like seam sealant, needles and thread, a few patches, and sometimes a mini-iron or heat gun.
One of the most important things to have in a tent repair kit is seam sealant. This can be used to seal up any tears or holes in the fabric of your tent. Thread and needles can be used to stitch up small tears, and patches can be applied to larger ones. A mini-iron or heat gun can be used to help adhere patches to your tent.
How Do You Mend a Damaged Tent of Fabric?
If your tent is made of breathable fabric, such as Gore-Tex, then you can use a tape designed specifically for Gore-Tex fabrics. If your tent is not made of breathable fabric, then you will need to purchase a new one.
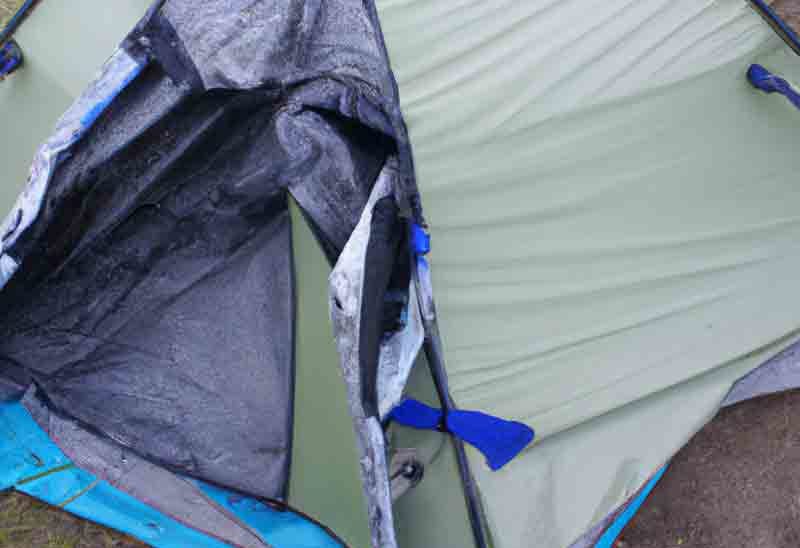
How Do You Seal a Tear in A Tent?
Sealing a tear in your tent may seem like a daunting task, but it doesn’t have to be! There are a few different ways that you can go about doing this, and the best method for you will depend on the size and location of the tear.
If the tear is small and located near the edge of the fabric, you can simply sew it closed with a needle and thread. If the tear is larger or located in the middle of the fabric, you can patch it from the inside with some adhesive tape (like duct tape) or iron-on patches. You could also patch it from the outside by stitching on a piece of fabric or using adhesive tape.
Is It Possible to Fix a Tent with Duct Tape?
Yes, it is possible to fix a tent with duct tape. The tape can be used to patch holes or hold down the loose fabric. It is important to make sure that the surface you are applying the duct tape to is clean and dry, otherwise, the adhesive will not stick properly.
If you are using the tape to patch a hole, it is best to use multiple pieces of tape crisscrossed over the hole so that there is plenty of coverage. Duct tape can also be used to secure tent poles or other parts that may become loose. Simply wrap the tape around the affected area tightly and knot it off so that it doesn’t come undone. Be careful not to use too much duct tape on your tent, as this could make it difficult to pack up and could also cause the fabric to rip when you remove the tape.

Conclusion
Whether you’re looking to save money or just want the satisfaction of a job well done, sewing your backpacking tent can be a rewarding experience. Be sure to choose the right fabric and cut out the pattern pieces carefully, then sew the panels together and reinforce the corners. You can also add any desired features, such as zippered doors or windows. With a little bit of effort, you can have a sturdy and reliable tent that will last for many years.